Good spark and fuel are, as you know, not enough to start an ATV engine. That said, you are on the right track, and as a mechanic, I, too, would begin troubleshooting by checking the spark and fuel supply. Spark and fuel issues are the most common ATV no-start causes.
That said, there’s one more ingredient we need to consider, and in this post, we’ll look at all three ingredients needed to start an ATV engine in more detail.
An ATV engine that’s getting spark and fuel but won’t start likely suffers from low cylinder compression or incorrect engine timing. Poor valve lash, failed head gasket, and worn piston rings are common causes of low cylinder compression.
There are many possible reasons, of course, for an ATV no-start, and in this post, we’ll attempt to cover the most likely causes.


ATV Engine Needs Three Things To Start
An ATV engine needs many components and sequences to play their part for the engine to burst into life. When troubleshooting a no-start, technicians are trained to focus on the Holy Grail, that’s, fuel, spark, and compression systems.
- Fuel
- Spark
- Compression
1 Fuel
Fuel is not just gas. Since an engine won’t burn gas alone, the gas must be mixed with oxygen (air), so we describe the mixture of gas and air as fuel. The gas element of the fuel must be fresh. Most folks don’t know that gas goes stale after a couple of months (and earlier, depending on how it’s stored), and if you don’t ride regularly, it is very likely the gas in your ATV tank is stale.


Stale gas lacks oomph; it isn’t as combustible as fresh gas and so starting an engine can be challenging, especially when the engine is cold.
So without fresh combustible gas, an ATV will struggle to start.
2 Spark
Fresh gas is great, but without a spark to ignite our fuel mixture. Our engine isn’t going to fire with just any old spark, no sir, that’s not going to do it. A weak spark will be extinguished by the fuel mix instead of igniting it.
3 Compression
The third and final ingredient is compression. Without a compressed combustion chamber, the mix isn’t confined or heated to a point where conditions are perfect for ignition, and so the starting sequence of ignition, combustion, and power stroke doesn’t happen.
Diagnosing ATV Spark & Fuel But No-Start
Checking spark and gas is among the first checks to make when diagnosing a no-start. As said earlier, you are on the correct track, and very shortly, we’ll have this figured out.
Before we get knee-deep in diagnosis, let us make some simple checks first, and here’s why. As a trained technician with twenty-five years under my belt (and, of course, been bitten a few times), I like to check a fact is a fact.
And so, with that said, I like to verify some common errors; I know this may seem trivial, but I’m often surprised by the errors made by simply making assumptions. And so, work with me here, and let’s assume nothing for the next few paragraphs.
Basic ATV No-Start Checks
Starting Procedure
Starting most engines will require using some type of gas enrichment to counteract the oxygen-rich mix associated with cold starts.


An engine loves a mix of air (oxygen) to the gas of 14.7 to 1 (14.7 parts oxygen to 1 part gas). It’s known as the AFR (Air Fuel Ratio).
Since cold air is richer in oxygen than warm air, cold engine starts are an oxygen-rich environment. Conversely, the engine under these conditions suffers from a lean condition. Lean means the gas component of the mix is insufficient.
And since cold engine starts naturally offers the engine greater oxygen, we need to adjust the mix so that the ratio is back in line with the optimum 14.7 to 1 AFR ratio.


Adjustment is handled differently by different engines. Some do it automatically, and others require the operator to adjust manually.
The adjusting approach is also handled differently by different engine makers; some add extra gas while others restrict airflow to the engine; it’s known as a choke. More oxygen means we need to add more gas.
Fresh Gas
Just before we get to diagnosing the choke, I should point out how important fresh gas is and how common stale gas is, especially in engines that lay idle for long periods. As said, modern gas is blended and goes stale surprisingly quickly, and depending on where it’s stored, it may go stale within as little as a month. If your ATV has been sitting idle for some time, expect a fuel issue as the root cause.

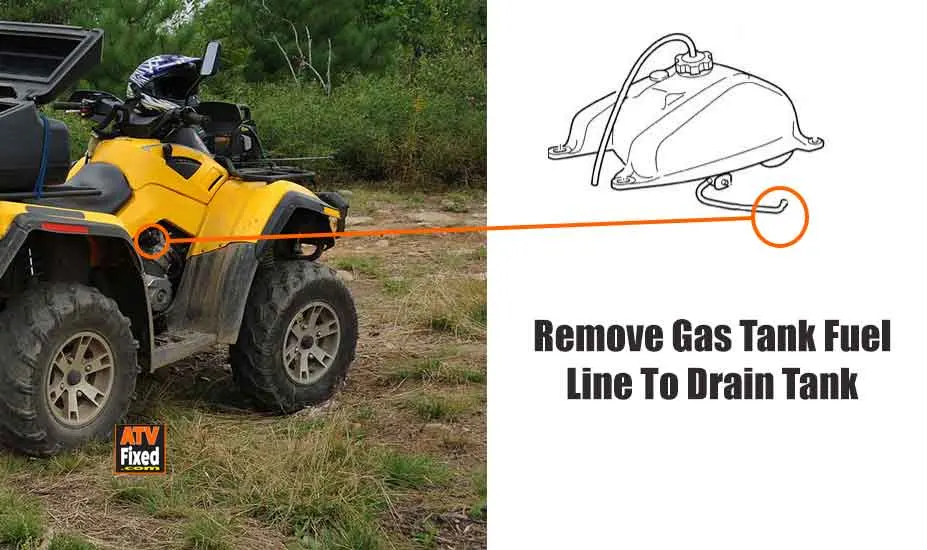
Draining old gas and refilling with fresh, consider adding a fuel stabilizer to keep the gas fresh for about a year.
Choke Diagnosis
Choke diagnosis consists of first checking whether the correct starting procedure is being used and, if so, if the choke system is working correctly. I like to check the air filter early in the troubleshooting procedure; removing the filter and attempting to start the engine is a fast way to eliminate it as a possible issue.
Then I’ll move on and run the following checks.
Correct Cold Start Procedure – You likely already know the correct procedure, but if you are unsure, go ahead and google your make and model to verify. Sure, you say, but my ATV started fine without choke previously. I say OK, but is the weather colder now? If so, the engine likely just needs some choke.
Remember, the lower the ambient temperature, the harder your ATV will be to start.
Is Choke Working Correctly? – I understand this can be difficult to answer and will require some stripping to access the carburetor, etc., but I got you covered; there’s a shortcut known as the “Gas shot.”
Gas Shot – The gas shot test is a simple test where we pour fresh gas into the cylinder. The gas shot test is an elimination round and answers many questions very quickly. I use it in the workshop all the time. The idea is simple, and here it is:
- Remove spark plug
- Add small amount of gas (about oil cap full) (gas must be fresh)
- Refit spark plug
- Attempt to start engine
Mechanic top tip – A funnel or syringe makes adding gas to the cylinder a ton easier.
With the test out of the way now, we’ll need to analyze the results, and the two results likely are as follows:
1 – The engine started, or fired (fired – meaning attempted to start). Firing can be identified as the engine not running, but smoke is seen at the tailpipe when cranking.
This result tells us that your ATV suffers from a fuel issue. Bad gas, Choke not working, Faulty fuel pump (if fitted), Blocked gas filter and Carburetor fault are all high on the list.
If this sounds like your problem, great! Go ahead and examine your fuel system, remembering stale gas is the number one fuel-related no-start issue. Draining and refueling usually, does the job, remembering to add fuel stabilizer to help prevent a further issue.
These links will help you nail your fueling system diagnosis and repairs –
- ATV won’t start
- ATV smells like gas
- ATV dies when I give it gas
- ATV only runs with throttle
- Why is my ATV running rich?
- Can I ride with choke on?
2 – The engine doesn’t start and critically makes no attempt to fire. This result tells us that you may have an ignition system fault or a compression or timing issue.
Since a lack of spark is the more likely issue, we’ll look at that fault first before checking compression and timing.
Weak Spark
If, after running the Gas shot test, you find you may have a spark issue, then you’ll want to check your spark again. I understand you have a spark but is the spark strong enough? A weak spark is the worst kind to have, as it causes you to discount the ignition system as the root cause of your no-start.


Swap the spark plug for a new or known good one early in the game to help eliminate a possible plug issue.
I advise checking the spark using a spark test tool when ignition system testing. (more on this below)
Before we begin testing, worth knowing what components are in an ignition system and what they do, they are as follows:


Stator – The Stator and rotor create a voltage that feeds the battery and bike electrical systems, including the ignition system. Without a functioning stator, nothing happens.
Pickup coil – Signals the CDI box to fire the spark plug via the coil.


CDI Box – Solid-state unit that’s responsible for controlling and adjusting the ignition timing.
Higher-end, more sophisticated ATVs may employ an ECU instead of a CDI box.
Coil and resistor cap – Coil and cap together convert low voltage into a high voltage which at the critical moment offers a ground path through the spark plug.


Spark plug – The plug is the business end; what began at the Stator ends here. The plug is the least complicated of all the ignition system components.
However, it is the component most likely to cause an issue.
Our mission is to eliminate all the easy stuff first, which means focusing on the spark plug first.


An in-line spark test tool is best as it stresses the whole system and will help locate a failed component that often doesn’t appear in the MacGyver-type spark test.
Check the condition of the spark plug, too; this simple guide will give you a heads-up on what each plug color and condition really mean – ATV plug color guide
Check the plug is correct by checking your manual and check the plug is gapped correctly. Always worth having a spare plug to hand; it’s great for eliminating a plug issue and can save a ton of diagnostic time.
Assuming the plug passes a visual, then I like to try a jump start when I suspect a weak spark. A rotating engine is required to create a spark (about 400 rpm), so a slow-cranking engine may cause a weak spark.
Jump starting scavenges power from an external battery, thereby boosting your ATV battery. Try a boost start, but before jump-starting, check your battery terminals are clean and tight. Loose dirty terminals are a common cause of no-starts.


If you need a jumpstarting refresher, check out this link – How to jumpstart an ATV?
If you find your ATV starts with a jump, suspect a battery issue. Running the following tests will help confirm where the fault lies –
Check also that the battery is charging at idle – Anything over 12.65 indicates it’s charging.
If, on the other hand, a jumpstart made no difference at all, but you feel the spark looks weak, then we’ll need to test the following components –
- Coil
- Stator
- Pickup coil
- CDI Module


You may find these test links helpful:
You’ll find the tools I recommend, including an inline ignition system test, here on the ATV tools page and common spare parts here on the ATV parts page.
If all checks out OK in your ignition system, then we’ll move on and check your compression.
Compression Checks
Compression is an engine’s ability to squash and maintain the cylinder’s contents inside the combustion chamber. When the contents are packed tightly into the combustion chamber, the spark plug fires and combustion occurs.
However, if compression isn’t built or maintained inside the chamber at the critical moment (past TDC), the mix won’t ignite.
And so, low compression is a possible cause of no-start.
Low Compression Common Causes
There are a ton of causes of low compression; the most serious is engine wear. That is not what any ATV owner wants to hear. However, not all causes of low compression are that serious.
Here’s a list of common causes:
- Engine wear
- Valve wear
- Valve lash adjustment required
- Blown head gasket
- Loose spark plug
How To Check Compression
Checking compression correctly requires a compression test kit, or a leak-down tester may be used to identify compression loss. You can check out the types I recommend on the Amazon links below:
Compression Tester on Amazon Leak Down Tester on AmazonA compression tester gives an exact reading, such as 100 psi. Bear in mind that engine maker compression values vary. Some test good at 100 psi, while others may have a min value of 150 or 200 psi; you’ll need to check your engine spec) this reading is then matched against a workshop manual, where the engine maker will give a min reading.


It’s common to run a dry compression test first and then a wet test; comparing the different results helps identify the root cause.


Compression test as follows:
- Remove spark plug
- Ground coil
- Fit compression tester
- Choke off
- Throttle wide open
- Crank over 6 – 10 times
- Read and note the highest reading
The wet test is the same but with oil in the cylinder.


The results of the Dry and Wet tests are interpreted as follows:
Both dry and wet readings are the same – Probable that you are facing an issue with the engine’s top end.
Readings are different, and compression is low – Probable your engine is experiencing issues with worn rings, pistons, cylinders, or a combination of all three.
Readings are the same, and compression is normal – Low compression is not the cause of your issue. At this point, we’ll go ahead and check the engine timing.


A leak-down test, in many ways, is more useful. It involves filling the cylinder with compressed air and using a test tool to measure the cylinder’s ability to hold pressure over a given period.
The added bonus of this test kit is it simultaneously points to the area at fault. In a problem engine, the compressed air will be heard to leak from the cylinder.
Diagnosis as follows, air leaking from:
- Oil cap or dipstick – worn piston rings : (
- From muffler – Exhaust valve issue (worn seat or may just need adjustment)
- From carburetor /air box – Intake valve issue (worn seat or may just need adjustment)
- Between cylinder head and block – Head gasket failure
You may find the following links helpful –
- ATV valve adjustment in 6 steps
- ATV valve adjustment symptoms
- ATV coolant in cylinder
- ATV coolant in oil
Testing Compression MacGyver Style
What if you don’t have either test kit to hand? We can try the MacGyver compression test kit. It involves our thumb and a rubber glove…..It’s not what you think.
This test method isn’t scientific or very accurate; it’s loosely accurate, a blunt tool if you like, but it does hold some value.
Test as follows:
- Remove spark plug
- Ground plug against cylinder head or use a jumper cable to remotely ground. An un-grounded coil wire will give you a jolt and is also bad for the ignition system.
- Place your thumb over the open plug hole (important to wear a rubber glove)
- Have helper crank engine
Two results are likely:
1. You’ve got some compression – You feel the effects of good compression on your thumb (vacuum and then propulsion)
2. You have no compression – You feel the effects of a lack of compression as your thumb will feel a mild or no effect of vacuum and propulsion as the engine is cranked over.
A lack of compression will likely require the aforementioned leak-down test kit to diagnose the root cause.
Timing Issue
If all checks out so far, or at least as best you can tell, then there’s one more item we can check – Engine timing. The engine, as you know, is like a watch, the internal parts all play a part, and they each have their moment to shine. When timing is off, it means some of the internal components are doing their thing too early or too late, usually the latter.
There are three components that must be timed in relation to each other correctly for an engine to run at its best:
- Engine pick up – Is a sensor that signals the CDI to remove coil ground and fire spark plug
- Crankshaft TDC (Top Dead Center) – Is a marked point on the crankshaft that provides a signal maker for the engine pick-up sensor
- Camshaft – Responsible for valve train control and is timed to the crankshaft, usually by the timing chain. (some engines employ geared cam, which means the valves are controlled by pushrods)
So how can you tell if the timing is off? There are two common ways to go about this; if an engine is running and the mechanic suspects the timing is out a little, then a timing light is used.
However, if, as in our case, the engine is a nonrunner, we’ll need to go ahead and remove some covers and check timing marks on both the crankshaft and the camshaft.
Ignition Timing
Timing light – For engines that are out of time by a little but still running, a timing light may be used. It’s a strobe light tool that’s connected to the plug wire, which causes the strobe light to operate intermittently. The timing light is then shone on the engine timing marks allowing for easy checking. This, of course, checks the ignition timing only, not the crankshaft to camshaft timing.
Crankshaft to Camshaft Timing
The less technical way is to just go ahead and remove some covers and rotate the engine by hand to check where the timing marks line up.
It involves removing some engine covers to check the crankshaft and camshaft gear/sprocket markings. It’s not difficult, just a little tedious.


For ATVs with pull starters, you may need to remove the pull assembly to access the timing window.
All engines are slightly different, but this is a pretty typical setup.
The process is as follows:
- Access the crankshaft timing window, as seen in the above picture.
- Remove the spark plug.
- Crank the engine over by turning the crankshaft counterclockwise with a socket and wrench.
- When the rotating mark (T) aligns with the engine cover mark (I), the engine is set to TDC.
But we are not finished yet; now we need to make sure the camshaft is in the correct position, and to do that, we’ll need to access the cam gear.
The process is as follows:


- Locate the cam gear
- Remove inspection cover
- Check the cam sprocket mark aligns with the cylinder head mark
How does the timing go out?
Three reasons are common:
- Jumped time – Timing sprocket, tensioner, and guides wear; they allow the chain to slip a tooth or two.
- Rebuild error – Error made when refitting the timing chain.
- Stretched chain – As chains wear, they stretch, and this causes the relationship between the crank and cam to change.
You may find this post helpful – How to tell ATV jumped time?


A comprehensive ATV no-start guide that will get you rolling in jig time.
You may find the following posts helpful:
- Air cooled ATV white smoke
- How to tell if ATV fuel pump is bad
- How to tell ATV jumped time
- Will ATV start with bad stator?
- How to jumpstart an ATV?
- ATV coolant in cylinder
- ATV coolant in oil
I’ve written a ton of ATV troubleshooting posts. Hopefully, you won’t need them, but if you do, we have you covered.


- About the Author
- Latest Posts


John Cunningham is a technical writer here at ATVfixed.com. He’s a Red Seal Qualified Service Technician with over twenty-five years experience. He’s worked on all types of mechanical equipment, from cars and trucks to ATVs and Dirt bikes.